Search This Blog

Friday, December 3, 2010

On vacation...until December 16th:)


Going to Japan for 2 weeks for some cutural and food adventures:)

Finally, the trip that I've been waiting is almost here. I'll be in Kyoto in less than 24 hours and might not have time to update the blog for the next two weeks.

I do, however, check emails regularly and will try to attend to questions whenever I can:)

Sayonara and will be back soon

Thursday, December 2, 2010

Christmas Series Macaron - Red: Raspberry Buttercream Macaron


A continuation from my previous post of Christmas series macarons, Green: Dark Chocolate Mint Macarons, this week is ... as you might have guessed it...Red: Raspberry Buttercream Macaron. It would be a good idea to whip these two batches of Red and Green macarons together for Christmas party or gift. The colours are so festive and christmasey.


This is the first time I made French buttercream for macaron filling. French buttercream is a perfect way to use leftover egg yolks from making macaron shells (hence, I never made it as I never had any egg yolks leftover. I usually used those yolks for ice cream, custard and crème brulèe). French buttercream is egg yolk mixed with cooked sugar syrup and butter. It tastes quite rich and smooth. It is also versatile that you can mix other ingredients in to create your own flavours, lemon curd, jam, fruit puree, to name a few. 


The raspberry macarons is now my most favourite. It's an OMG moment when I first bit into it. The taste is to die for. The raspberry must be a fruit from heaven or something, for pastry and sweet anyway. The flavour is just so intense. It is full of tang, rich aroma and rich colour. The flavour blends so perfectly with the rich buttercream and sweet meringue shells. It made my mouth watered thinking about the taste experience. It has so much depth in its flavour.


Com'on, let's get festive and whip up some red macarons!

 Raspberry Buttercream Macarons
Make about 25 3-cm macarons

Note:

You can also see more detailed intructions on making macarons in my Basic Macaron Recipe and I heart Macarons blogs.

Macaron shell ingredients
100 g egg white (about 3 extra large eggs, aged 24- 48 hrs in advance. Take egg white out of the fridge a couple of hours before making to bring it to room temperature)
110 g almond meal (almond powder, ground almond)
160 g pure icing sugar (powder sugar)
60 g caster sugar (fine sugar)
a pinch of red colouring powder or liquid

Raspberry buttercream ingredients
3 large egg yolks, at room temperature
90 grams castor sugar (fine sugar)
90 grams butter ointment (soft butter, but not melting)
10 grams water
½ cup raspberry jam (I used a homemade jam in this recipe)

Making macaron shell

Sifting almond meal and icing sugar together by pushing them through a sieve. You can also grind almond meal and icing sugar together in a food processor to have finer almond meal mixture and it will be easier for sifting. However, this is not necessary.

If using colouring powder, mix it with caster sugar in a small bowl until you achieve the desired colour (note that the colour need to be much more intense than the desired end-result as the colour will fade once mixed with egg white and other dry ingredients)

Using electric mixer, beat egg white on a high speed until foamy, gradually add caster sugar, one tablespoon at a time. Continue beating the egg white until it reaches a glossy stiff peak. If using colouring liquid, put about 10 drops of green colouring liquid into the egg white mixture and mix on a low speed until well-combined.

Mix egg white into an almond meal mixture. Stir quite vigourously to break the egg white into dry ingredients for the first ten stokes or so. Continue to mix the egg white with dry ingredients until well combined (try the motion of lift, fold and push the mixture to the side of mixing bowl). The mixture should be thick, glossy and well-blended. The batter will look like a very thick cake batter.

Spoon the mixture into a piping bag fitted with a 1-cm plain nozzle (size #11).

Pipe mixture onto a tray lined with parchment paper or non-stick baking mat (Silpat) about one-inch in diameter and one inch apart.
Tap trays on a kitchen bench a few times to flatten the piped macarons and remove the air bubbles.

Leave the piped shell uncovered at room temperature for 30-60 mins until you can touch the shell without them sticking to your fingers.

Preheat the oven to 160c/180c (convection/conventional) about 15 mins before baking.

Reduce the temperature to 140c/160c (convection/conventional) and bake macarons for about 13-15 mins. Baking time will depend on the macaron size.

Remove baking trays from oven. Remove macarons from the tray and put them on cooling racks. You may need a serrated knife to help removing macarons. Spraying a little water onto the hot tray underneath the paper also help releasing macarons (the steam gives that magic releasing power). 

Once they're completely cool, sandwich two shells together with raspberry buttercream. Keep the filled macarons in a covered container in the fridge. They can be kept upto 5 days (or longer). Macarons taste better after they have been chilled for at least 12 hours. Filled macarons can also be frozen.


Making raspberry buttercream

Make the butter oinment by wrapping the butter in plastic wrap and putting in the microwave for about 10 seconds. Use a rolling pin to roll over the wrapped butter and make it into a paste. Do not overwork the butter as you don't want it to turn to liquid. Set aside.

Mix the sugar with the water and bring to a boil. Using a candy thermometer to measure the sugar temperature, continue to boil until it reaches 121C (249F). If the sugar begins to crystallize on the sides of the pan, wash them down with a pastry brush dipped in the water or briefly cover the pan and let the steam dissolve the crystals naturally.


Meanwhile, whip egg yolks in electric mixer on medium high speed. They will begin to turn pale and yellow and will become light and thick.

When the sugar reach 121 C or 249 F, remove it from heat. With the mixer on high, slowly pour the syrup into the egg yolks in a thin stream between the whip and the sides of the bowl. Be careful not to splash the hot syrup, or your buttercream may from small sugar crystals in it. Return the mixer to medium high, and continue beating until the yolks are thick and fully cooled.


Reduced mixer speed to medium and gradually add small amount of butter ointment, but only as much as it can be absorbed into the mixture before adding the next amount. Continue to beat well until the buttercream is smooth. About 15 minutes. If you add the butter too quickly, the butter can melt and the mixture will turn to liquid.

As the buttercream solidifies, add raspberry jam, and beat for an additional minute.


Chill the buttercream filling until ready to use.

Voila, enjoy the most delicious macarons ever!

Stollen - my first festive fruit bread

When Christmas is just around the corner, one can’t help feeling festive and want to generate Christmas spirit all around. This is my first Christmas as a  bread enthusiast and I have my eyes on a couple of festive breads. One of them is stolen,  a festive German breads eaten during Chistmas time.  The bread symbolises the blanket of the baby Jesus, and the coloured fruits represent the gifts of the Magi.


I think I only had stollen once. I bought a pre-package ones imported from Germany. It was quite sweet and dry, yet it was lovely, a very tasty bread.

I chose the recipe from Peter Reinhart’s  Bread Baker Apprentice: Mastering the arts of extraordinary breads. I changed parts of the recipes to suit what I have in the pantry (I am one of those who would try to find substitutes to recipes in my pantry instead of venturing out and buy new packs of ingredients). Some of the substitutes I had were using lemon and orange zests instead of orange/lemon extract, and using sherry instead of brandy (I know, I know, this is probably so untraditional, but let me tell you that it worked really well). I also used the pre-packaged dried fruit mix, instead of making my own fruit mix as the recipe suggested, and again it worked nicely.

I knead the dough by hand and knead it until the gluten was fully developed before adding the mixed fruit soaker. It would be almost impossible to develop the gluten further once you add fruit soaker.

The dough was very sticky when it is mixed with the fruit soaker. I had to put about 4 tablespoons of more flour in to adjust consistency of the dough. The texture was almost like a cake. The dough was still quite sticky even dough I added more flour. However, the liquid seemed to get absorbed during the fermentation and the dough wasn’t too hard to shape after all.


I had trouble shaping the loaves following Peter Reinhart's instruction. I determined to get it right...so, I made this again the weekend after (it's actually an excuse, I love the bread and want to have it again:)). I ended following Susan’s instructions on Wild Yeast Blog which is easier to follow and quite straight forwards, yet achieving the same result.

With my first batch, I brushed the hot stollen loaves with vegetable oil but I used butter with my second bake. The ones with vegetable oil had better moisture, texture and taste

It is a very delicious bread, moist and aromatic.  We love them so much and finish one small loaf in a day, and the other a day after. I also bought a loaf from my second bake to work and my workmates love it too.  I sure will do this again and again. It's great bread all year round, not necessary for only christmas. I also think that the recipe could be good for hot cross buns as well.


Stollen recipe

Make 1 large or 2 small stollens

Sponge
114 g whole milk
64 g all-purpose flour
12.5 g instant yeast

Fruit
170 g golden raisins, plus additional for sprinkling on final dough (or you can use mixed fruit for the amount of golden raisin and candied fruits combined)
170 g candied fruit mix, plus additional for sprinkling on final dough
114 g brandy, rum or schnapps (I used sherry in my bake and it worked well)
14 g orange or lemon extract (I used lemon and orange zest and it worked nicely)

Dough
284 g unbleached all-purpose flour
14 g sugar
5 g salt
3 g (1 teaspoon) grated orange zest (optional)
3 g (1 teaspoon) grated lemon zest (optional)
7 g (1 teaspoon) ground cinnamon
47 g (1 large) egg
70 g unsalted butter, at room temperature
57 g water
57 g silvered blanched almonds (or marzipan)

  1. Make the sponge by warming the milk to about 100F. Whisk in the flour and yeast. Cover with plastic wrap and ferment for 1 hour, or until the sponge is very foamy and ready to collapse when tapped.
  2. Meanwhile, combine 1 cup each of the raisins and fruit mix, the brandy, and the orange extract. Set aside.
  3. To make the dough, in a 4-quart mixing bowl (or in the bowl of an electric mixer), stir together the flour, sugar, salt, orange and lemon zests, and cinnamon. Then stir in (or mix in on low speed with the paddle attachment) the sponge, egg, butter, and enough water to form a soft, but not sticky, ball. This should take about 2 minutes. When the dough comes together, cover the bowl and let the dough rest for 10 minutes.
  4. Add in the fruit and mix it with your hands (or on low speed) to incorporate.
  5. Sprinkle flour on the counter, transfer the dough to the counter, and begin kneading (or mixing with the dough hook) to distribute the fruit evenly, adding additional flour if needed. The dough should feel soft and satiny, tacky but not sticky. Knead for approximately 6 minutes (4 minutes by machine). Lightly oil a large bowl and transfer the dough to the bowl, rolling it around to coat it with the oil. Cover the bowl with plastic wrap.
  6. Ferment at room temperature for 45 minutes. The dough will rise somewhat but will not double in size.
  7. Sprinkle flour lightly on the counter and transfer the dough to the counter. If making two small loaves, divide the dough into two equal pieces. Use the rolling pin to press the dough in the middle and roll the dough to create a well in a middle. The middle well/gap should be about an inch lower that the dough surrounding it. Sprinkle silvered almond and additional fruit mix over the top. Lift the top flap to close the dough by having the top flap sitting on top off the bottom flap.
  8. Line a sheet pan with baking parchment. Transfer the stolen to the pan and, as you set the dough down, curl it into a slight crescent. Mist the dough with spray oil and cover loosely with plastic wrap. Proof for approximately 1 hour at room temperature, or until the dough is 1 ½ times its original size.
  9. Preheat the oven to 350F with the oven rack on the middle shelf.
  10. Bake the stollen for 20 minutes. Rotate the pan 180 degrees for even baking and continue to bake for 20 to 50 minutes, depending on the size of the loaves. The bread will bake to a dark mahogany color,  should register 190F in the centre of the loaf, and should sound hollow when thumped on the bottom.
  11. Transfer the bread to a cooling rack and brush the top with vegetable oil while still hot. Immediately tap a layer of powdered sugar over the top through a sieve or sifter. Wait for 1 minute, then tap another layer over the first. The bread should be coated generously with the powdered sugar. Let cool for at least 1 hour before serving. When completely cool, store in a plastic bag. Or, leave them out uncovered overnight to dry out slightly, German style.

Wunderbar!
 Submit this post to YeastSpotting.


Wednesday, December 1, 2010

Christmas macarons - Chocolate Mint Macarons


Christmas is just around the corner. Let’s do something festive.

I have been thinking about Christmas theme macarons once I started to see the Christmas merchandises in the stores.

When thinking about Christmas, there are quite a few things representing Christmas that come to my mind. Green, red, spice, fruit, brandy, mint, to name a few.  So, I have three Christmas macaron flavours in my mind that I plan to make and post in the next few weeks as part of my Christmas macaron series.

First entry – let’s  start with a Christmas symbol that we are all familiar with, candy cane, which usually comes with mint flavour and red-green-white stripe. Hence, the dark chocolate mint macarons with mint candy cane sprinkle.


I used fresh mint (peppermint) to infuse the cream used for chocolate ganache and added a small amount of peppermint essence to bring out more minty flavour. I have tried using only fresh mints but found that the mint flavour didn’t quite come through. I’ve also tried using only peppermint essence to flavour the mint ganache and found that it lacked the flavour subtlety provided by fresh mints. The combination of fresh mints and peppermint essence provides the good of the both worlds, subtlety yet pronounced minty flavour.

The mint macarons would be a perfect treat after meals and it’s a good option for not-so-sweet tooth dessert eaters. The dark chocolate with the peppery minty flavours complement well with sweet meringue shell. It is also one of my favourites (well, I have way too many favourites when it comes to macarons)


Dark chocolate mint macaron recipe
Make about 25 3-cm macarons

Note:
You can also visit my Basic Macaron Recipe and I heart Macarons blogs for more details and instruction on making macarons.

Macaron shell ingredients
100 g egg white (about 3 extra large eggs, aged 24- 48 hrs in advance. Take egg white out of the fridge a couple of hours before making to bring it to room temperature)
110 g almond meal (almond powder, ground almond)
160 g pure icing sugar (powder sugar)
60 g caster sugar (fine sugar)
a pinch of green colouring powder or liquid
1 mint flavour candy cane candy, crushed

Dark chocolate mint ganache ingredients (macarons filling)
100 g dark chocolate, cut into small pieces
100 ml thickened cream (whipping cream, minimum 35% fat content)
20 g butter, cut into cubes
A handful of peppermint leaves, roughly chopped
1 teaspoon peppermint essence (optional)

Making macaron shell

1. Sifting almond meal and icing sugar together by pushing them through a sieve. You can also grind almond meal and icing sugar together in a food processor to have finer almond meal mixture and it will be easier for sifting. However, this is not necessary.

2. If using colouring powder, mix it with caster sugar in a small bowl until you achieve the desired colour (note that the colour need to be much more intense than the desired end-result as the colour will fade once mixed with egg white and other dry ingredients)

3. Using electric mixer, beat egg white on a high speed until foamy, gradually add caster sugar, one tablespoon at a time. Continue beating the egg white until it reaches a glossy stiff peak. If using colouring liquid, put about 10 drops of green colouring liquid into the egg white mixture and mix on a low speed until well-combined.

4. Mix egg white into an almond meal mixture. Stir quite vigourously to break the egg white into dry ingredients for the first ten stokes or so. Continue to mix the egg white with dry ingredients until well combined (try the motion of lift, fold and push the mixture to the side of mixing bowl). The mixture should be thick, glossy and well-blended. The batter will look like a very thick cake batter.

5. Spoon the mixture into a piping bag fitted with a 1-cm plain nozzle (size #11).

6. Pipe mixture onto a tray lined with parchment paper or non-stick baking mat (Silpat) about one-inch in diameter and one inch apart, and sprinkle crushed candy cane on top of  piped shells (only on half of them).

Let's sprinkle some Christmas spirit on to the shell


7. Tap trays on a kitchen bench a few times to flatten the piped macarons and remove the air bubbles.

8. Leave the piped shell uncovered at room temperature for 30-60 mins until you can touch the shell without them sticking to your fingers.

9. Preheat the oven to 160c/180c (convection/conventional) about 15 mins before baking.

Reduce the temperature to 140c/160c (convection/conventional) and bake macarons for about 13-15 mins. Baking time will depend on the macaron size.

10. Remove baking trays from oven. Remove macarons from the tray and put them on cooling racks. You may need a serrated knife to help removing macarons. Spraying a little water onto the hot tray underneath the paper also help releasing macarons (the steam gives that magic releasing power). 

11. Once they're completely cool, sandwich two shells together with chocolate ganache. Keep the macarons in a covered container in the fridge. They can be kept upto 5 days (or longer). Macarons taste better after they have been chilled for at least 12 hours. Filled macarons can also be frozen.


Making dark chocolate mint ganache

1. Put chocolate pieces in a seperate bowl.

2. Heat thickened cream with mint leaves in a small pan over medium heat. When it comes to the boil, remove it from heat and let stand for 10 minutes to infuse the mint flavour. Return the pan back to the stove on medium heat. Remove the pan from heat once it comes to the boil and strain the cream to remove the mint leaves.  Pour the cream over chocolate pieces. Let it sit for about 10 seconds, then stir the mixture until the chocolate is completely melted. Scatter the butter pieces and stir until it's melted.


3. Stir peppermint essence in and mix until well-combined.

4. Chill the ganache in the fridge until ready to use. It needs to be chilled at least an hour or more until it's firm enough for the filling.

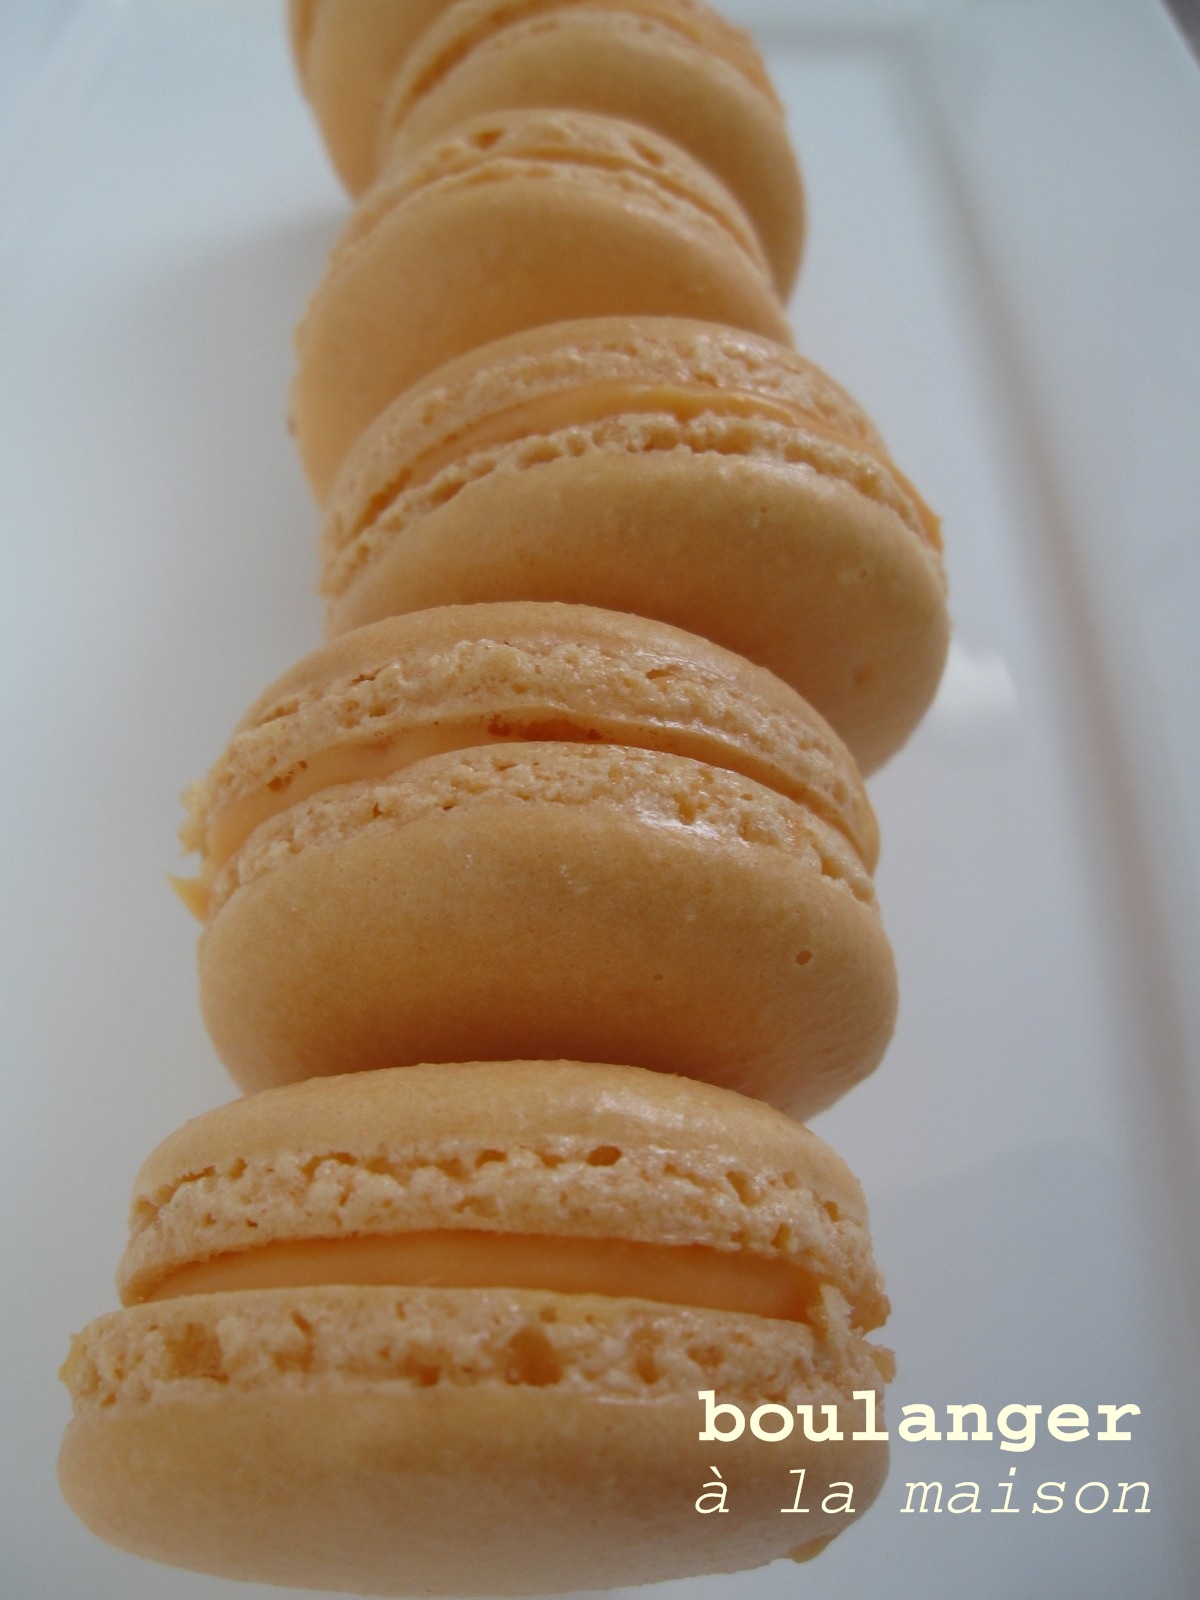
Great for Christmas gift

Next week will be 'red Christmas macaron'.


Monday, November 29, 2010

Semolina Multigrain Sourdough - time to start using some of 2 kg semolina flour in the pantry


I was running out the bread flour and didn’t want to buy a new 5-kg bag as I’m going away in a week. Looking through my pantry, it occurred to me that I have 4 bags of fine semolina in there. Perfect, semolina bread is on the menu this week.


Slightly off-track: I was in the quest to find the elusive durum flour and convinced myself that fine semolina was durum flour and ended up buying fine semolina every time I see  them without realising that I already had them in my pantry. That’s why I ended up with 4 bags! However, I made many loaves of semolina bread, where the recipe called for durum flour, using the fine semolina and they worked fine.

I came across semolina multigrain bread in Jeffrey Hamelman’s Bread: A Baker's book of techniques and recipes. The recipe calls for commercial yeast. I usually prefer to bake with wild yeast (sourdough starter) whenever I can so I converted it to sourdough bread using the stiff sourdough starter.


The recipe has 50% durum flour (which I substitute with fine semolina flour and it worked fine) and 50% bread flour. It has 20% grains consisting of polenta (coarse corn meal), millets and sesame seeds. I used mixed white and black sesame in the recipe.  Black sesame is very aromatic, more so than its white counterpart. Its aroma really comes through when you bite into the bread and it is even more so when the bread is toasted.


I found that semolina flour did not absorb the water as well as wheat flour. This could be because it is not flour, but more of fine coarse grain.  As of the result, the dough was quite wet to work with.

The crumb is soft, chewy and well opened. It is a very tasty loaf with an aroma of black sesame seeds, sweetness of polenta and slight crunchiness of millets.


Now I only have three more bags of semolina to go and will start a fresh new bag of flour after my holiday. Good solution that ended up with such a tasty loaf.  

Perfect for scramble eggs with chive, using recipe from Michel Roux's Eggs cookbook


Recipe note: 1. I left the dough to autolyze for 30 minutes.
2. The shaped loaves was retarded in the fridge overnight
3. Two folds, during 2 hours and a half fermentation

Semolina Multigrain Sourdough recipe
adapted from semolina multigrain bread from Jeffrey Hamelman's Bread: A Baker's book of techniques and recipes

Make 2 large loaves

Overall formula
Durum flour 454 g 
Bread flour 454 g
Coarse cornmeal (polenta) 74 g
Millet 54 g
Sesame seeds 54 g
Water 718 g 
Salt 20 g
Total 1.83 kg

Baker’s percentage
Durum flour 50%
Bread flour 50%
Coarse cornmeal (polenta) 8%
Millet 6%
Sesame seeds 6%
Water 79%
Salt 2%
Total 201%

Stiff-levain build
Bread flour 136 g
Water 95 g
Culture 29 g

Soaker
Coarse cornmeal 74 g
Millet 54 g
Sesame seeds 54 g
Water, boiling  227 g

Final dough
Durum flour 454 g 
Bread flour 318 g
Water 396 g
Salt 20g
Soaker all of the above
Stiff-levain all of the above (less 29 g)


1. Stiff-levain build: Make the levain build approximately 12 hours before the final mix.

2. Soaker: Mix all soaker ingredients at the same time when making levain build. Mix well and keep it covered at room temperature until required.

3. Mixing: Add all the ingredients and soakers to the mixing bowl except the salt and levain. Mix or stir the ingredients together until it becomes a shaggy mass. Correct the hydration as necessary. Cover the bowl with plastic and let it stand for an autolyse phase of 20 -60 minutes. At the end of the autolyse, sprinkle the salt over the surface of the dough and cut the levain into fist-sized chunks and place on top of the dough, and continue kneading until the medium gluten development is formed.

3. Bulk fermentation: 2 ½ hours

4. Folding: Fold the dough twice, at 50-minute intervals

5. Dividing and shaping: Divide the dough into 2 equal pieces, make a pre-shape dough balls and let it rest on the bench for 10-20 minutes. Shape the doughs into round (boule) or oblong (batard).

6. Final fermentation; Approximately 2 -2 ½  hours (alternatively, retard for up to 8 hours in the fridge)

7. Baking: with normal steam, 225C (440F) for 40 45 mins, turn the loaves half way through the bake.

Submitting this post to YeastSpotting

Thursday, November 25, 2010

Evoke your senses with Orange Blossom Macarons


One of my favourite passtime is browsing green grocer, deli and grocery store. I enjoy browsing through aisles and aisles of foods to get some inspirations for new macaron concoctions and new bread flavours.

I came across orange blossom water during my browsing routine at Thomas Dux, a green grocer and thought that it could be a good flavour for macarons. I never cooked/baked with orange blossom water before but my past experience with rosewater and lavender assured me that it would have worked well.


Orange blossom water is distilled water with essential oil of orange blossom. It has a strong, sweet and rich citrus aroma and is used extensively in middle east cooking. When I first opened the bottle, the sweet aroma just literally made me smile. It’s a unique scent that I have never encountered anything like it before. It felt like I was being transported into a beautiful garden in the middle of spring. It smells just beautiful.

I mixed orange blossom water through the white chocolate ganache to get orange blossom filling for macarons. The orange blossom macaron didn’t disappoint. It delivered the sweet aroma and distinctive flavour. It is the sort of flavour that made me smiling and thought “wow” to myself when I first bit into it. It totally evokes my senses of smell and taste. Now, I have so many orange blossom recipes in my mind that I wish to try, orange blossom pannacotta, orange blossom crème brulèe, or even orange blossom chocolate tart…the list is endless.


This batch was also for S’ workmate who was leaving weeks ago. I love making macarons for gifts and would jump to any opportunities to make it. It’s the joy of making and sharing these little beauties.


I also mixed the orange blossom macarons with jaffa macarons for the gift


Orange blossom macaron recipe

make about 25 3-cm macarons 

Note:
you can also visit my Basic Macaron Recipe blog and I heart Macarons  for more details about the making of macarons

Macaron shell ingredients
100 g egg white (about 3 extra large eggs, aged 24- 48 hrs in advance. Take egg white out of the fridge a couple of hours before making to bring it to room temperature)
110 g almond meal (almond powder, ground almond)
160 g pure icing sugar (powder sugar)
60 g caster sugar (fine sugar)
a pinch of red and yellow colouring powder or liquid

Orange blossom ganache ingredients (macarons filling)
100 g white baking chocolate, cut into small pieces
80 ml thickened cream (whipping cream)
20 g butter, cut into cubes
1 – 2 tablespoons orange blossom water
few drops of red and yellow colouring liquid or pinch of colouring powder

Making macaron shells

1.      Sifting almond meal and icing sugar together by pushing them through a sieve. You can also grind almond meal and icing sugar together in a food processor to have finer almond meal mixture and it will be easier for sifting. However, this is not necessary.

2.      If using colouring powder, mix it with caster sugar in a small bowl until you achieve the desired colour (note that the colour need to be much more intense than the desired end-result as the colour will fade once mixed with egg white and other dry ingredients)

3.      Using electric mixer, beat egg white on a high speed until foamy, gradually add caster sugar, one tablespoon at a time. Continue beating the egg white until it reaches a glossy stiff peak. If using colouring liquid, put about 10 drops of red and yellow into the egg white mixture and mix on a low speed until well-combined.

4.      Mix egg white into almond meal mixture. Stir quite vigourously to break the egg white into dry ingredients for the first ten stokes or so. Continue to mix the egg white with dry ingredients until well combined (try the motion of lift, fold and push the mixture to the side of mixing bowl). The mixture should be thick, glossy and well-blended. The batter will look like a very thick cake batter.

5.      Spoon the mixture into a piping bag fitted with a 1-cm plain nozzle (size #11).

6.      Pipe mixture onto a tray lined with parchment paper or non-stick baking mat (Silpat) about one-inch in diameter and one inch apart.

7.      Tap trays on a kitchen bench a few times to flatten the piped macarons and remove the air bubbles.

8.      Leave the piped shell uncovered at room temperature for 30-60 mins until you can touch the shell without them sticking to your fingers.

9.      Preheat the oven to 160c/180c (convection/conventional) about 15 mins before baking.

10. Reduce the temperature to 140c/160c (convection/conventional) and bake macarons for about 13-15 mins. Baking time will depend on the macaron size.

11. Remove baking trays from oven. Remove macarons from the tray and put them on cooling racks. You may need a serrated knife to help removing macarons. Spraying a little water onto the hot tray underneath the paper also help releasing macarons (the steam gives that magic releasing power). 

12. Once they're completely cool, sandwich two shells together with chocolate ganache. Keep the macarons in a covered container in the fridge. They can be kept upto 5 days (or longer). Macarons taste better after they have been chilled for at least 12 hours. Filled macarons can also be frozen.


Making orange blossom chocolate ganache

1.      Put chocolate pieces in a seperate bowl.

2.      Heat thickened cream in a small pan over medium heat. When it comes to the boil, remove it from heat and pour over chocolate pieces. Let it sit for about 10 seconds, then stir the mixture until the chocolate is completely melted. Scatter the butter pieces and stir until it's melted.

3.      Mix orange blossom water in and mix until well-combined. It is suggested to start with one tablespoon and test as you go. Add more orange blossom water if you prefer a well-pronounced flavour. I like mine strong and ended up with two tablespoons.

4.      Chill the ganache until ready to use. It needs to be chilled at least an hour or more until it's firm enough for the filling.


Voila, fleur d'oranger macaron. Not quite Laduree, but quite lovely!


Wednesday, November 24, 2010

Sometimes all you need is a plain sourdough - Pain au Levain with Whole Wheat Flour


Sometimes, all you need is a plain sourdough and a splash of olive oil, maybe some dukkah thrown in.

The plain sourdough bread, i.e. without fruits, grains or any derivatives, is something I try to make more often and manage to forget to make it. Not that I don’t like plain sourdough, I just seem to get distracted by other concoctions and the idea that breads with grains or fruits are more interesting and tastier. Every now and then, I would just realize that I haven’t made the plain sourdough bread for a while, or sometimes S would remind me and make a request for it.


Vermont sourdough from Jeffrey Hamelman’s  Bread: A Baker's book of techniques and recipes is the plain sourdough I made most often. I liked it so much so that it is the only plain sourdough I baked from the book .

Well, one should expand one’s horizon a little and venture into the new plain sourdough territory. Flipping through Hamelman’s Bread cookbook, I came across Pain au Levain with whole wheat flour, which looked quite interesting. The recipe has slightly higher levain percentage, 20% versus 15% in other recipes. It contains mixed flour (rye and bread flours) in stiff levain build. It also has 20% whole wheat flour in the recipe.

This recipe also serves another purpose. As the recipe calls for stiff levain, it is a good timing that I can convert my liquid starter (100% hydration) to stiff starter (60% hydration) before I am going away in the next two weeks for a month and won’t have chances to feed my lovely pet starter, Jerry. I was afraid that he would be starving (for flour and water) and pass away while I’m away.

Thanks to a post on The Fresh Loaf about the sourdough starter feeding. Apparently, stiff starter is more resilient than liquid one. It is more likely that it will survive after not being fed for a while. I only need to feed Jerry a few times when I’m back from holiday to wake him up and come back to his cheerful and active self.

The bread has a pronounced sour flavour to it due to the stiff levain used and a small amount (6.5 %) rye flour in the levain. The bread achieved a good volume with a good oven spring. The crumb is moist and chewy, slightly chewier than usual. This bread works well with olive oil and dukkah (Middle East spice and nut mix).

Another great way to enjoy sourdough bread, dipping in olive oil and dukkah

The bread bottom was not as brown as I would have liked but the crust is shiny. It is probably the shiniest crust I had so far. This could be a result of too long an oven steaming. I got distracted and left the steaming for about 5-10 too long (I filled the cast iron pan with boiling water three times and left  the pan in steaming on for about 20 mins).


Relatively nice crumb:)


Recipe note:

1. I left the dough to autolyze for 30 minutes.
2.The dough was retarded overnight in the fridge
3. Two folds, during 2 hours and a half fermentation

Pain au levain with whole wheat flour

Make 2 large loaves

Overall formula
Bread flour 680 g
Whole wheat flour 182 g
Medium Rye Flour 45 g
Water 618 g
Salt 17 g

Levain build (60% hydration)
Bread flour 130 g
Medium rye flour 9 g
Water 85 g
Mature culture (stiff)  28 g
 
Final Dough
Bread flour 550 g
Medium rye flour 36 g
Whole-wheat flour 182 g
Water 533 g
Salt 17 g
Levain 224 g (all less 2 tablespoons)

Baker Percentage
Bread flour 75%
Whole wheat flour 20%
Medium rye flour 5%
Water 68%
Salt 1.8%

1. Stiff-levain build: Make the final build approximately 12 hours before the final mix.

2. Mixing: Add all the ingredients to the mixing bowl except the salt and levain. Mix or stir the ingredients together until it becomes a shaggy mass. Correct the hydration as necessary; the addition of a bit more water may be necessary depending on the absorption of the whole-wheat and rye flours. The consistency of the dough should be medium - neither dry nor overly moist. Cover the bowl with plastic and let it stand for an autolyse phase of 20 -60 minutes. At the end of the autolyse, sprinkle the salt over the surface of the dough cut the levain into fist-sized chunks and place on top of the dough, and continue kneading until the medium gluten development is formed.

3. Bulk fermentation: 2 ½ hours

4. Folding: Fold the dough twice, at 50-minute intervals

5. Dividing and shaping: Divide the dough into 2 equal pieces, make a pre-shape dough balls and let it rest on the bench for 10-20 minutes. Shape the doughs into round (boule) or oblong (batard).

6. Final fermentation; Approximately 2 -2 ½  hours (alternatively, retard for up to 8 hours in the fridge)

7. Baking: with normal steam, 225C (440F) for 40 45 mins, turn the loaves half way through the bake.

Submitting this post to YeastSpotting.

So simple yet so effective, nice crusty bread with olive oil and dukkah