Search This Blog

Thursday, October 28, 2010

Perfect match, green tea ice cream and red bean paste

Green tea and red bean (adzuki bean) is truly a classic ingredient pair for Japanese sweets/snacks and it is easy to understand why. They truly are a perfect match for each other...it's the match made in heaven. The slight bitterness of grean tea complements really well with the sweetness and texture of red bean.

Green tea ice cream with red bean paste is a classic Japanese dessert (and one of the best). Most of Japanese restaurants back in my home town (Bangkok, Thailand) would have it on their menu. I am a big fan of them. It is the dessert that I love so much. Back home (well, I don't live in Thailand anymore), green tea is very popular as being a super food. It is rich in vitamin C and has a distinctive flavour. Somehow, green tea and red bean also makes me feel nostalgic. It reminds me of the similar dessert or drink I had when I was living in Thailand. 


I came across green tea powder (matcha powder) at Fuji Japanese supermarket in Prahran, Melbourne. Immediately, I was thinking "perfect, I can make green tea ice cream with this". In the past, I just mixed the green tea powder through store-bought vanilla ice cream and voila...green tea ice cream. I served them with home-made red bean paste (I don't like store-bought one as it is way way too sweet) quite a few times at dinner party (also as my own treats). That was before I got into cooking/making things from scratch. Thanks to the discover of my passion for bread-making.

"Green tea powder, it comes in a small tub, approximately 6-cm height. It costs around AUD$7"


Nowadays, I made green tea ice cream from scratch. They are truly smoother and taste so much nicer than the ones I made using vanilla ice cream. And they are not difficult to make. The result will worth your effort.

Before I bought the Cuisinart ice cream maker, I had to churn the ice cream manaully. It worked and it tasted alright. But after I made the ice cream using ice cream maker... really, why wouldn't I buy it sooner? The ice cream texture is significantly different and took much less time and effort using the machine. This is one of the gadget I am most happy with...money well spent and will be perfect for the upcoming Summer season.

"My new toy, Cuisinart ice cream maker. I have so much fun playing with it. It's so easy to use and produce great result with little effort."


One of the reason that I'm into making ice cream lately is because I have so many left-over egg yolks from making macarons. They're so many rich, custard-like brioche I can make and eat, and the same go with creme brulee...I had to find other avenue to use the yolks. Ice cream is the answer!

There are few different ways you can make ice creams, with egg yolks, without egg yolks, with less cream, with more creams. Personally, I prefer ice cream made with egg yolks, and the equal amount of milk & cream (thickened cream/whipping cream). It is simply smoother, creamier and just plain nicer. The number of yolks you put in will affect the creaminess of the ice cream, the more egg yolks, the creamier the texture. No yolks at all means ice cream can become rather icy, i.e. with ice flakes.

Green tea ice cream with red bean paste recipe

Green tea ice cream
makes almost 1 litre ice cream

6 egg yolks (I have tried making it with 3 yolks and it was still creamy and tasted as nice)
250 ml (1 cup) milk
250 ml (1 cup) thickened cream (whipping cream with minimum 35% fat content)
100 g (1/2 cup) caster sugar (fine sugar)
1 tablespoon green tea powder (matcha powder)

Mix milk, cream and green tea powder in a small saucepan over medium-high heat and bring it to the boil. Stirring gently to dissolve the green tea powder. When the mixture start to boil, immediately remove the saucepan from heat.

In the meantime, beat egg yolks with caster sugar at medium-high speed unitl it is pale and creamy (the sugar will almost dissolve).


Pour the hot green tea mixture into the egg mixture and stir at low speed until well-combined.


Put the mixture back into the small sauce pan and cook it over low-medium heat. Keep stirring the mixture until it coats the back of the spoon. It will take approximately 4-5 minutes.

"Cook the mixture at the low-medium heat for 4-5 minutes"


"The mixture starts to coat the back of a spoon"


Transfer the mixture to a bowl sitting on top of an ice bath (this is to cool down the mixture and to prevent egg become scramble as egg will continue to cook even though it is off the heat).

Note: I have tried skipping the ice bath and put the mixture straight into the fridge (NOT freezer)  I then wait until it is completely cool down before start the ice cream churning process.

"The ice cream mixture is sitting on top of an ice bath in a bigger bowl"

Once the ice cream mixture is completely cool down. Put it into the ice cream maker and follow the instruction of the manufacturer.

Note: If you do not have an ice cream maker, I say, go and buy one now :-) Well, you can actually make an acceptable ice cream without an ice cream maker but there'll be more works, i.e. you'll need to chill the mixture in the freezer and keep taking it out and breaking it with the beater few times before the ice cream has set. This is to break the ice flakes forming.

"Ice cream is getting churned in the machine"


Red bean paste (adzuki bean paste)
make about 4 cups


1 cup red bean (adzuki bean)
1 cup sugar
3 cups water
a pinch of salt

"This is a very easy recipe. It tastes far more superior than the store-bought ones and more importantly, you can adjust the sweetness to your taste. I find the store-bought ones are way too sweet."

Wash the beans and put in a medium-size pot filled with water. Bring it to the boil over a high heat. Drain and discard the water.

Add about water to par-cooked red beans and bring to the boil over high heat.


Reduce the heat to medium, cover the pot and simmer the beans until they are soft. It will take approximately 1 - 1.5 hours. The water should be almost completely absorbed by the time the beans are soft. Add water as needed to prevent it getting too dry (I had to add one more cup of water half way through cooking).


Gently mix in sugar and pinch of salt until all combined and glossy. The paste will be thick with half and whole red beans. I like the paste to have a good mash consistency so I used the potato masher to help crushing the beans.


"The finished bean paste is quite thick and has got a little amount of liquid in them. The beans are still cooking off the heat and the liquid will completely absorbed into the paste".

Store the bean paste in a covered container in a fridge for up to a week.
Note: This bean paste can be used as filling to a sweet bread, chinese bread bun, pancake topping, or with a dallop of cream, yogurt or milk.
Serve the bean paste with green tea ice cream.


Yummy!


Gone in 60 seconds....

Wednesday, October 27, 2010

Blueberry cream cheese braid

I found this recipe from the web site I visit (highly) frequently, The Fresh Loaf. The recipe was rated highly by TFL members. It's a sweet bread with blueberry and cream cheese filling...I know...it sounds yummy, right?

My original plan was to make this bread to our picnic with my former workmates that I haven't seen for years. I had all the ingredients ready (well, I'm a super organised individaul who plans and gets ready well in advance) but we had to cancel our picnic as it had been raining continuously from the day before the picnic and the rain was carrying on until days later.

Somehow, I felt like I had an unfinished business. I had a big bag of frozen blueberry and cream cheese in my fridge. I really needed to make this bread to feel settled:) So, here go, I made the bread finally, and in the spirit of sharing, I took this bread to work and share them with couple of my workmates. The bread got a rave review. Thanks to a great recipe from The Fresh Loaf


This bread is very versatile. Both sweet and savoury fillings would work with this bread dough as the bread is just slightly slightly sweet and enriched. This bread is also visually appealing because of braiding technique used.

For detailed recipes and long long threads of discussions and ideas on varieties of this bread, you can visit Blueberry cream cheese braid page at The Fresh Loaf.

"making the sponge half an hour before making the final dough"


"making the blueberry filling with blueberry, sugar, lemon juice and corn flour"


"the finished blueberry filling. I think the filling is a tad too thick. I think we can do with half the corn flour in the recipe."


"the rolled dough, with cream cheese and blueberry filling, then braided together"


"the finished loaf. I was thinking that it will be much much uglier because of my poor braiding technique. I'm quite surprise that it turned out looking alright. Thanks to the oven spring and glossy finish"


"and...yummy breakfast!"

Sunday, October 24, 2010

Lastest experiment with whole wheat multigrain sourdough

I was intrigued by Peter Reinhart's 100% whole wheat sandwich loaf from Whole Grains Bread cookbook I made couple of weeks ago (details are in my blog) on how soft and open the crumb was for 100% whole wheat bread. I wanted to try adapting Peter Reinhart's WW flour handling into the mutigrain whole wheat sourdough that I made often and see what outcome the WW flour soaker will deliver to the bread that I already know the taste and texture profile.

Whole wheat multigrain sourdough from Jeffrey Hamelman's Bread cookbook is one of my (and S') all-time favourite. I make it every few weeks. The bread tastes amazingly sweet for just a small amount of honey in it. It has about 50% whole wheat flour. The recipe opens for any grain-mix that  you might like. My grain mix are millet, oats, pearl barley, polenta and flaxseed. Now, come to think about it, I think polenta could also contribute to the sweetness of the loaf.

Well, my curiosity keeps bugging me. I had to try experimenting this. I need to know once and for all:)

My plan was to follow Hamelman's recipe and method with an addition of whole wheat flour soaker. I made the whole wheat flour soaker at the same time I made liquid-levain and grain soaker.

The result? I find that the crumb is much softer and the bread tastes slightly sweeter than it was before. I also think that the WW flour soaker helps the flour to absorb the water better. The dough is much looser and wetter than usual comparing to my previous bakes. I am quite happy with the soaker method and I think I will include it in my future whole-wheat related bake.


Whole wheat multigrain sourdough
make two 800g-loaves


Liquid levain
bread flour 92 g
water 133 ml
mature sourdough culture 20 g

Grain Soaker
(you can use any grain-mix that you like, mine is below)
millet 28 g
oats 28 g
barley 28 g
flaxseeds 28 g
polenta 28 g
hot water 187 ml

Whole wheat flour soaker
whole wheat flour 386g
water 159 ml
milk 30 ml

Final dough
bread flour 295g
water 130ml
salt 1 tablespoon
yeast 3/4 teaspoon
honey 26g
liquid levain   all of the above
grain soaker   all of the above
whole wheat soaker    all of the above


Liquid levain -Mix all the ingredients until combined 12-16 hours before making the final dough. Leave it in covered container at room temperature.

Grain soaker - mix the grains together and pour the boiling water over the grain mixture. Stir to combine and leave it in a covered container at room temperature (I made this at the same time I made the levain).


Whole wheat flour soaker - mix all ingredients together until all combined. Leave it at room temperature (I also made this at the same time of levain and grain soaker)

Final dough - Add all the ingredients into a mixing bowl. Mixing on the first speed for 3 mins or 5-10 minutes by hand. Adding more flour or water, if need to, to achieve a sticky and loose dough consistency.

Cover the bowl with plastic wrap or bag and leave it to autolyse for 30-60 mins.

Return to kneading the dough by the mixer at second speed for further 3 mins or 15-25 mins by hand. The dough should have a moderate gluten development. The dough temperature should be around 76F.

"the first time since I started making bread that I can achieve the dough temperature around 76F without adjusting water temperature. Spring is finally here."

Bulk fermentation for 2 hours. Do one stretch and fold after 1 hour.

Divide the dough into two equal portions and shape into batards or boule.

Proof at room temperature for a further 1-2 hours until almost double in size or retard the dough in the fridge overnight.

If you retard your dough in the fridge, take the dough out of the fridge and let it sit at room temperature for 1-2 hours while you preheat your oven (this is what I usually do on Saturday morning).


"before and after the proofing"


Bake with normal steam at 235c (460F) for 40  to 45 mins. Rotate the tray half way through the bake. The oven temperature can also be lower 225c (440F) if the loaves are browned too quickly.

You can almost tell when the bread is ready. They'll send a sweet aroma all over the kitchen. It is even more so for this bread. It has a sweet honey aroma that I wish my photos can deliver that to you.

"it's not often I got my scoring right. This time, I did...very happy with the ear:)"


"relatively open crumbs for a high-percentage whole wheat sourdough"


"a yummy lunch with avocado spread"

This bread has always been my favorite and the method using WW flour soaker takes it a step further and make me enjoy the bread even more. This is a wholesome bread with lots of nutritients, fibre and lots of flavours at the same time. I wish you'll give this recipe a go...and love it as I do.

I also submit this post to YeastSpotting at Wild Yeast Blog.


Friday, October 22, 2010

Green Tea Macarons

I discovered the green tea powder (matcha powder) by accident when I was at Fuji Mart, a Japanese Supermarket in Prahran.  I love green tea but never thought of making them by powder before. The first idea when I saw them was to mix it up with a store-bought vanilla ice cream to create a green tea ice cream.

This was over a year ago when I had no idea that making your own ice cream was not at all difficult. Now that I've become an ice cream snob (in addition to being a bread snob and macaron snob), an idea of mixing green tea powder through vanilla ice cream (though it tastes yummy) doesn't seem enticing, kinda put me off actually. Home-made green tea ice cream is so smooth, creamy, and super yummy, yet quite easy to do. I'll post recipe later...in future blog.

Enough of the detour to green tea ice cream, back to today's blog - green tea macarons. This is one of my favourites. The slightly bitter green tea flavour blend really well with the sweetness of macaron shells. Well, macarons are all about a balance of flavour, right.


Green tea macarons recipe

Macaron shell recipe (the recipe and instructions are here in my previous blog)
make 24-26 macarons (3-cm size)
In addition to the basic recipe, you will also need:
1 1/2 teaspoon green tea powder (matcha powder)
5-6 drops green food colouring

Instructions
Folllow the instuctions on here from my blog, omitting lemon zest from the shell ingredients  and adding grean tea powder into the shell mixture. You'll need to sift green tea powder together with icing sugar and almond meal.


"Green tea powder or matcha powder, you can find them in Asian store or Japanese store. It's small tub, approximately 6cm height. It costs about $7 (Australian Dollar)."


Green tea white chocolate ganache recipe
fill 24-26 macarons (3-cm size)

Ingredients
100 g white chocolate, chopped
80ml thickened cream (whipping cream with 35% fat content)
20g butter, cut into small chunk
1 1/2 teapoon green tea powder

Place white chocolate in a bowl.

Mix green tea powder with cream in a small pot over medium-low heat. Keep stirring the green tea cream mixture until the powder dissolved. Heat the cream mixture unitl it comes to the boil.

Pour the scant cream mixture over white chocolate and let it sit for about 30 seconds. Stir the chocolate until it is melted. Scatter butter over the chocolate mixture and stir until it dissolves.

Chill the ganache mixture until ready to use.  When ready, spread about 1/2 - 1 teaspoon of ganache into macaron shell before sandwich the shells together.


 "here you go, a yummy macaron, rich in green-tea goodness of vitamin C:)"


First time making baguettes

I've been wanting to try making the french bread, baguette, for ages. It's been on my list of things I want to try making. Other things on my long list are bagels, green-tea bread, eclair, tuile, chocolate fruit bread, chinese cream buns, french sponge cake (genoise sponge), biscotti, coconut icecream,... The list can go on and on...and it's only getting bigger every day. So much I want to try, so little time.

Finally, the day has arrived. It was a wet and cold weekend. It was the day to stay in and really let the oven on at its highest heat...to warm my place up.


I decided to make a baguette, poolish style from Jeffrey Hamelman's Bread cookbook. I also wanted to try making bread by strictly following the temperature suggested in the book and used my new thermometer that I bought last week.

I followed Hamelman's mixing temperature guideline in the book by taking into account the four temperatures, i.e. flour temp, room temp, poolish temp and water temp. I kneaded the dough by hands. I added the friction temperature of 20F into the formula, which I think the friction from my hand kneading was actually around 10F. At the end of kneading, my dough temperature only reached 68F. At least, I can used this information for my next bread making.

My first attempt went alright. There were some mishaps with the shaping, transferring the dough onto the baking pan, and bread scoring. The bread doesn't look too badly. The taste, however, is quite nice.

I watched a VDO from YouTube that I found very useful. Hamelman also included the baguette shaping intruction in the book but I found it's quite hard to understand from the text. It's much easier to see the shaping in action and I can practice as I'm watching them. 

Here is the link to the video. http://www.youtube.com/watch?v=OI-WstoakmQ.

Baguette poolish style recipe
makes 2 baguettes

Poolish
bread flour 150g
water 172 ml
yeast 1/16 teaspoon, instant dry


Final dough
bread flour 303g
water 172 ml
salt 1 1/2 teaspoon,
yeast 1/2 teaspoon + 1/8 teaspoon
Poolish (all of the above)


Make poolish: Mixing yeast in the water , add flour and mix until smooth. Cover the bowl with plastic wrap and stand at room temperature for 12-16 hours.


Make the final dough:  Add all the ingredients into mixing bowl, including poolish. Mix the ingredients until it comes together as a ball (5-10 mins by hand, first speed in the mixer for 3 mins). Leave the dough to autolyse (cover and leave at room temperature for 30-60 mins).

Continue kneading for another 15-20 mins by hand or second speed in the mixer for 3-4 mins. You will feel the dough texture changed from shaggy mass into shiny, smooth, cohesive mass. The dough is quite wet. If kneading by hand, you will need to keep you hand wet by dipping them into water.


"you can see the different dough texture before and after the gluten has developed from autolyse and kneading from the top two pictures. "


Put the dough into a well-oiled bowl and cover with plastic wrap or bag and bulk ferment it at room temperature for 2 hours, with one fold after 1 hour. 


Divide the dough to 2 equally portions (with my oven size, I would divide the dough into 3 pieces next time) , preshape the dough, and shape into baguette.

Proof the baguette on a couche, seems size up, cover with plastic, proof for 1-1.5 hrs or until almost double in size.


"my home-made couche from cutain peices sold at IKEA"


Baking with normal steam, at 235c (460F) for 24 or 26 mins. Turn the tray around half way through the bake.

And voila...my first ever baguettes. There are still plenty of rooms for improvement, especially in the shaping and scoring departments:) Anyhow, I'm quite happy with the finished products for my first attempt.


And the crumbs......


And they were the perfect matches to our dinner, a big bowl of steamed mussels with white wine.


Also, a nice complement to broccoli sour cream soup with walnut and proscuitto...yummy and healthy!


Things I've learnt from this bake:

  • Even though baguettes seem to fit the oven tray after the shaping. It expands quite substantially (I should have known that, right, it's the yeast-activity in there). The shaped loaves ended up too long to fit onto the tray and oven. I had to cut one of my loaves in half. Minor disaster! It still tasted nice and didn't look too badly.

  • After I transferred the dough from the couche to baking paper, I realized that the loaves are too big for the tray. I tried to move the loaves back into the tray and cut them. The dough was stuck on the paper. Everyone, non-stick baking paper will only become non-stick once it is heated. When it's not, it's sticky paper!

  • The sticky paper situation also contribute to my not-so-brown loaves. When I transferred the loaves onto the paper, they were just too close to each other and I can't adjust the spaces between baguettes. Yes, they were stuck onto that non-stick sticky paper.

Wednesday, October 20, 2010

Sweet Life - Lemon Brûlée Tart

After what seemed to be an eternity, the long-awaited order from Peters Of Kensington arrived last week (took over 10 days this time). The new kitchen toys are a probe thermometer for bread making, an ice cream machine and a blowtorch. I couldn't wait to use them, especially the blowtorch!There's a ginger brulee tart recipe in Bourke Street Bakery cookbook I’ve wanted to try. But when a big bag of lemons arrived from my workmate Rob’s garden the plans changed to lemon brulee tart.

Before the blowtorch we improvised by using the oven’s grill to burn the sugar on top of creme brulee. It was sort of okay, it gave a burnt sugar crust, but it also melted the custard, ending up a rich and delicious drink.  So it’s exciting to have the blowtorch. I’m not sure why, but using the blowtorch made me feel like a sophisticated cook.


I used my leftover pate brisee (shortcrust pastry, tart dough) that I froze from last weekend, from making the silverbeet ricotta quiche (details are in my blog: http://youcandoitathome.blogspot.com/2010/10/produce-from-garden-silverbeet-ricotta.html?showComment=1287406124600). The recipe comes from Michel Roux's Pastry: Savory and Sweet cookbook, which I adore. You can find the recipe here.

This tart is very simple to make, yet tastes sublime and looks elegant with a bit of burnt sugar on top.

Lemon brûlée tart recipe

make 4 small tarts

80g pate brisee (shortcrust pastry)


lemon curd filling
2 eggs
50ml lemon juice
1 teaspoon finely grated lemon zest
60ml thickened cream (whipping cream with 35% fat content)
40g caster sugar
4 tablespoons sugar (extra, for sprinkle the top of the tart)

Take the pastry dough (pate brisee) out of the fridge 5-10 mins prior to rolling (because of the high butter content, the dough is quite hard to roll just right out of the fridge).

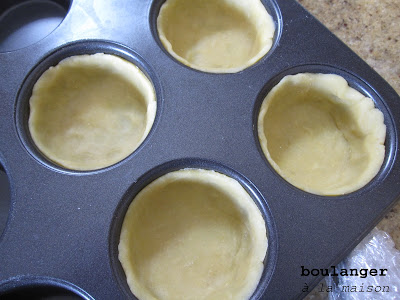
Roll the dough to 2mm thin. Use the round 8-cm pastry cutter to cut 4 pieces of tart dough from the rolled pastry.  If you don't have a pastry cutter that size, you can use a glass or bowl as a guide to cut the pastry. Line the small muffin tin (80 ml capacity) or small tart pan with the tart dough.


Chill the lined pan (with pastry dough) in the fridge for at least 20 mins (to prevent shrinking). Pre-heat the oven to 180c/200c (convection/convention).

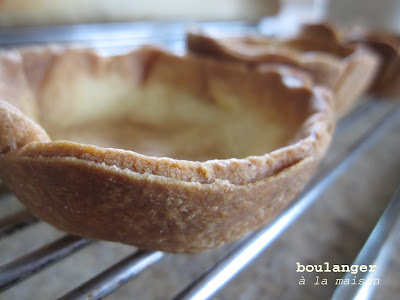
Blind bake the tart shell for 15 mins.
(note: blind baking is where you line your tart with baking paper and fill the tart pan with pastry weight, dry rice or beans)

Take the pastry out of the oven and remove the pastry weight/dry rice/beans from the tart shell. Cool the tart shell on the rack and leave them to be completely cool before filling the lemon curd.

You can keep the tart shell in an air-tight container in the fridge or at room temperature. It'll be good for about 2-3 days.


Make the lemon curd filling:

Whisk eggs and sugar in a bowl until sugar dissolves. Whisk the cream and lemon juice into egg mixture until combined. Put the bowl over a small pot half-filled with simmering water and continue whisking the mixture to prevent any lumps. Make sure that the bowl doesn't touch the water in the pot, otherwise you won't achieve a smooth mixture. The lemon mixture will become thickened once it's ready. This will take about 5 mins.

 Take the lemon curd off the heat and continue whisking for another one minute. Chill the lemon curd in the fridge at least 8 hours or overnight.
Before serving, fill the tart shell with lemon curd to the very top. The tart will  need to be slightly over-filled.  Sprinkle sugar on top of the tart.


Using the blow-torch to burn the sugar unitl the crust is formed and brown. If you don't have a blow-torch, pre-heat the broiler (oven grill) to very hot. Put the tart right under the grill until the sugar is melted.


And voila....lemon brulee tart, umm...what a sweet life!


I love the blowtorch and it makes me wondering why I didn't get it earlier. Now, I'm having an eyes on creme brulee for dessert next weekend.

Friday, October 15, 2010

Snickers Macarons – heavenly caramel, peanut and chocolate macarons

I love Snickers. I love them so much that when I was at Uni I always kept a bag of baby Snickers in my pantry. My reasoning was, one baby Snickers a day will keep sugar cravings away. Somehow I always blamed the stress of working long into the night on assignments when the inevitable happened and I'd eat the whole bag.

It was a bad, bad, bad idea to have Snickers on-hand. They are highly addictive and almost impossible to stop at one! The combination of salty, sweetness of caramel along with nuttiness of peanuts (all coated in chocolate!) that make Snickers soooooo good . You’ll never go wrong with these three ingredients together. It promises heaven and never fails to deliver.

What do you get when adding those elements together with an almond meringue? Snickers macarons. Heaven!!! A word of warning… like me, you may not be able to stop at one... or more of these little gems.

Yummy Snickers macarons


I substitute half of the almond meal (ground almond) with ground peanut. Noticeably, I find that ground peanut changes the macarons’ texture. It gives more crunch and a fuller texture to the shell (note: crunch isn't necessarily a good thing for macarons as it means dry and crunchy, a definite NO NO for macarons. However, using ground peanut gives a fuller texture and still melts in your mouth), plus it gives the shell a much nuttier taste. Personally I love peanuts, so I find that this flavorsome macaron a nice alternative from pure almond meringue.

Here’s the recipe for Snickers macarons…

Makes about 25 macarons (3 cm)

Macaron shell: Ingredients

100 g egg white (aged at room temperature 24- 72 hrs)
55g ground almond (almond meal or almond powder)
55g ground peanut
160g pure icing sugar
3 teaspoon cocoa powder
60g caster sugar (fine sugar)

Note: I personally go by macaron shell ratio of (which means I weight egg white first before determining the rest of ingredients):
  • 1 part egg white
  • 1.1 part ground almond (or mixture of ground nuts)
  • 1.6 part icing sugar
  • 0.6 part caster sugar
If the peanut you use is unroasted, dry roast your ground peanut in a pan over low-medium heat for about 4-5 mins.

see here for complete instructions on macaron shells,

In addition to the basic macaron shell, you can sprinkle a crushed peanut brittle or crushed peanut praline onto the top of piped macaron shell or omit this step altogether. But I find that macarons are more attractive with some sprinkle on the shells :)

To me, a sprinkle of crushed peanut praline on top is likeputting on a little lipstick... it's a nice finishing touch :)


Peanut caramel filling for macarons
I adapted the recipe from Latin America's caramel spread below:
http://www.whats4eats.com/desserts/dulce-de-leche-recipe

Ingredient
1 cup full cream milk
45 g sugar (1/3 cup)
1/2 teaspoon vanilla extract
1/8 teaspoon baking soda
2 tablespoons crushed peanut brittle of peanut praline (you can crush the nut in food processor or grinder)
a pinch of salt

Add all the ingredients to a small heavy-based saucepan and stir to dissolve all sugar.
Put the saucepan over medium heat and bring to boil. Reduce heat to very low and simmer, stirring frequently until thickened and caramelised, about 20 - 40 mins.

Mix crushed peanut brittle into the caramel spread. Chill the caramel filling until ready to use.


Heaven!
Recipe note:
What I used in place of peanut praline is an Asian crushed peanut candy available in most Asian grocery stores. I bought mine from Asian store on Victoria St in Richmond.

Crushed peanut candy usually comes in a pack of tenindividualy wrapped pieces in a bag for $2.50.


The candy is brittle enough that you can crush it by hand or by using a spoon. I used this for both, mixing in the caramel fillings and sprinkling on top.
These little beauties are divine. If you are a peanut and/or caramel lover you'll love these.